Media Tools

Remove pauses from screen recordings

Remove inactive moments from a screen recording without fiddly manual cuts. Think while you type, grab a coffee, or pause between actions - those moments are removed automatically, leaving only the meaningful interactions in your video. Elevate your app demos, keep your QA videos straight to the point, create engaging tutorials, or showcase your work.

MP4 · MOV · max 1024 MB · max 60 min

Compare each frame with the previous one and drop frames that are considered visually similar. The output video contains only frames where a meaningful visual change occurred.


This approach produces very smooth playback for gradual interactions such as typing, dragging elements, or animations, because the video simply skips redundant frames while preserving every visible change. However, when the screen changes significantly - for example by opening a new page or dialog - the transition may feel too abrupt. Only a few frames of the new screen are kept before playback continues, giving the viewer very little time to absorb the new content.

How to record your screen on iPhone

Screen recording is built into iOS and only takes a few seconds to set up. Here's how to enable, start and stop a screen recording.

Step 1

Enable Screen Recording

If you don't already see the Screen Recording button in Control Centre:

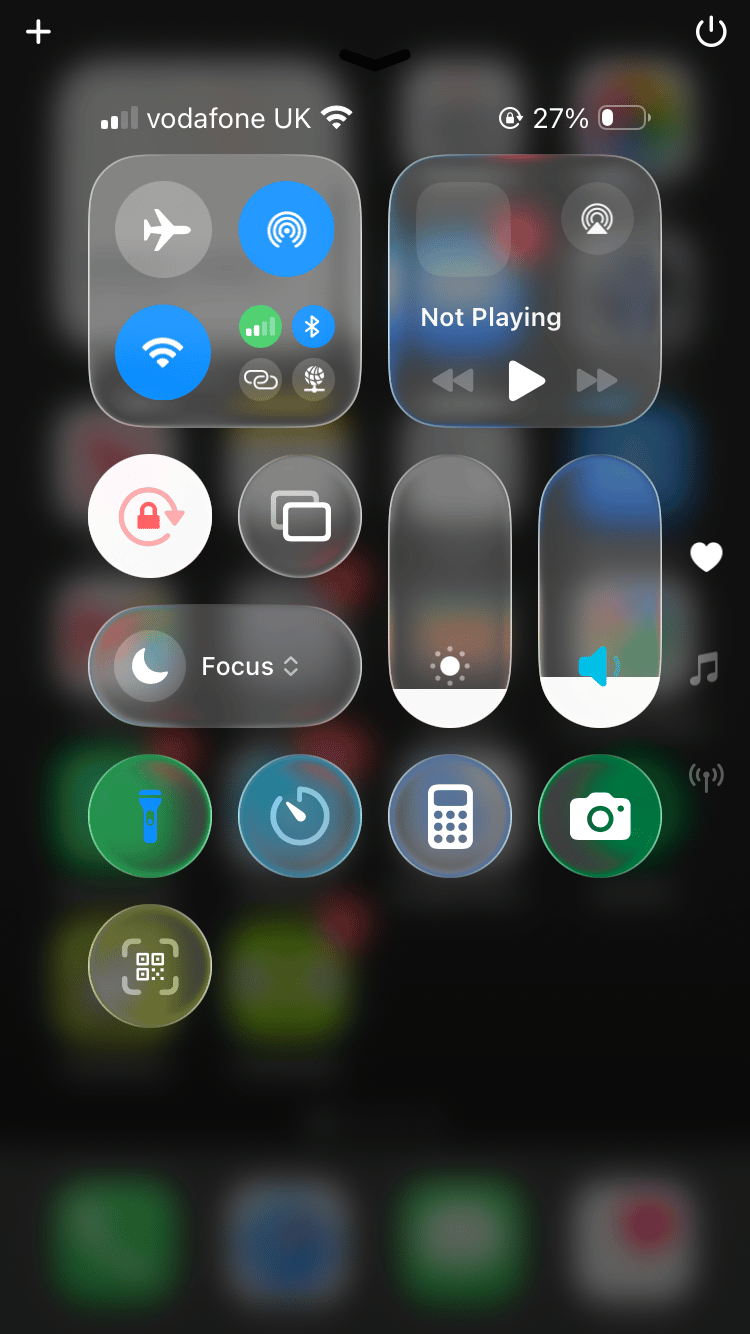
  1. Swipe down from the top-right corner of the screen. On older iPhones, swipe up from the bottom to open Control Centre.
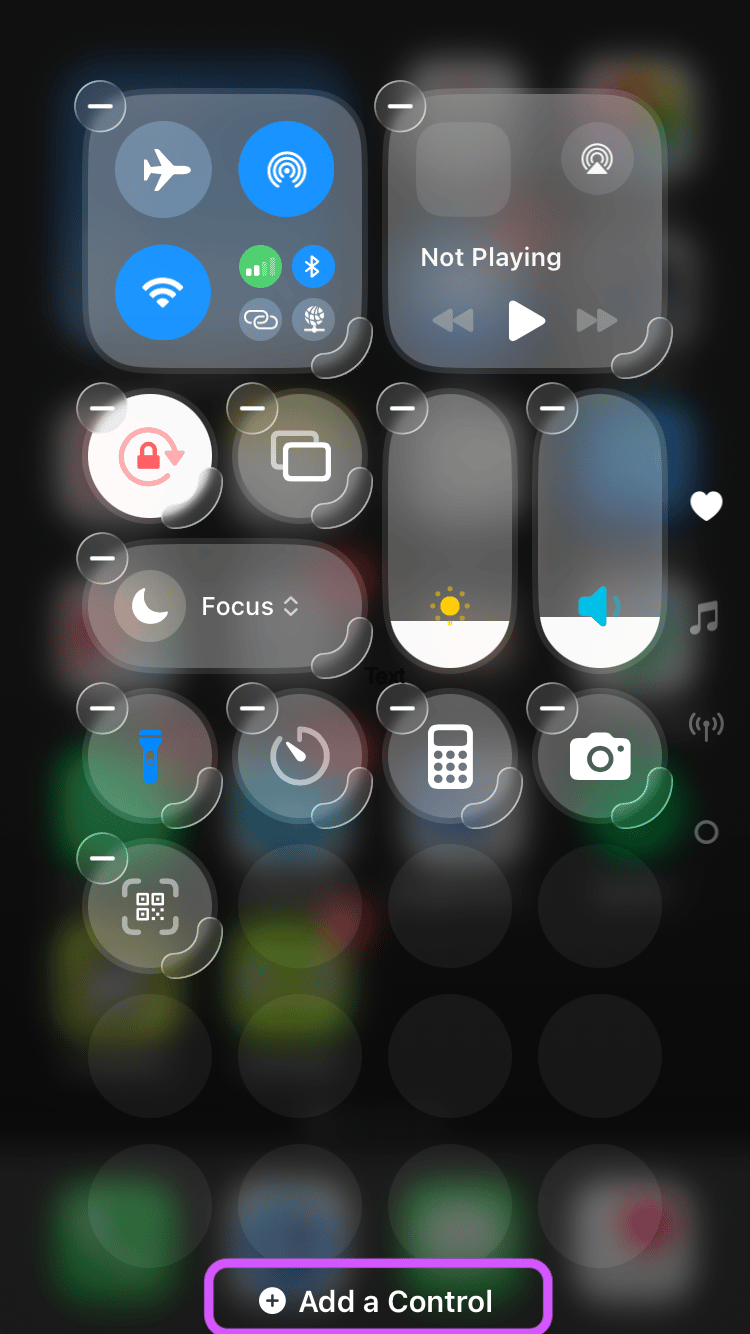
  2. Press and hold an empty area until the Add a Control option appears, then tap it.
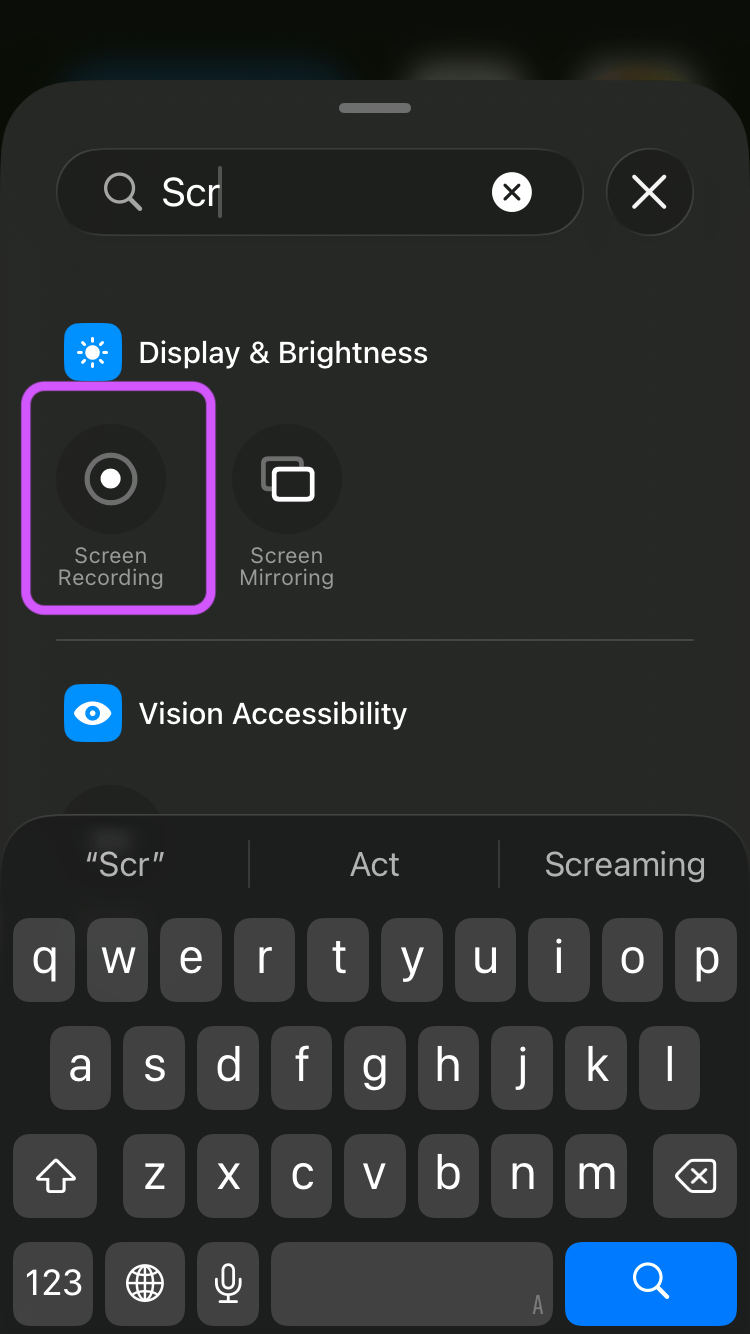
  3. Find Screen Recording and add it to your controls.
Open Control Centre
Open Control Centre
Press and hold, then tap Add a Control
Add Screen Recording
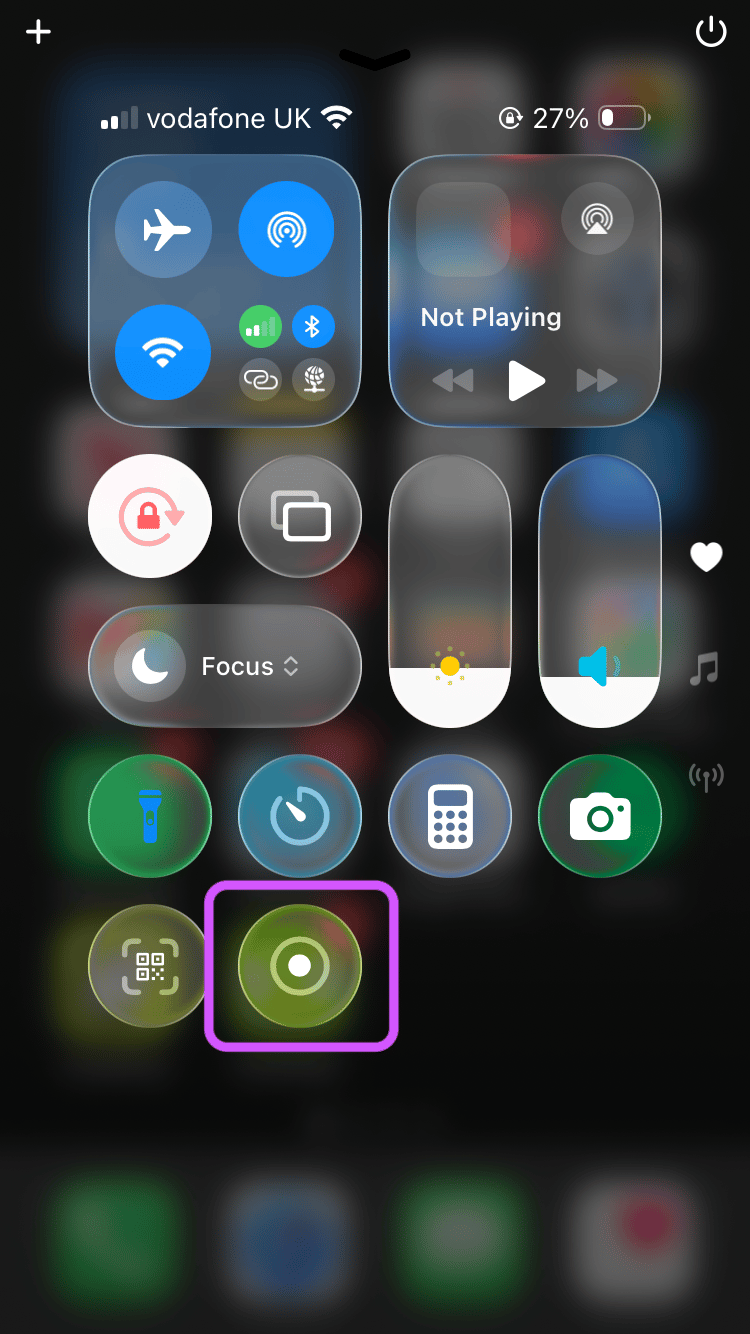
Check that the control has been added

You only need to do this once.

Step 2

Start a screen recording

  1. Open Control Centre by swiping down from the top-right corner of the screen. On older iPhones, swipe up from the bottom.
  2. Tap the Screen Recording button.
  3. A three-second countdown will begin.
  4. Leave Control Centre and use your iPhone normally. Everything displayed on the screen will be recorded.

Record microphone audio

Press and hold the Screen Recording button before starting, then turn on the microphone if you want to record your voice or surrounding audio.

Step 3

Stop the recording

When you're finished, stop the recording in either of these ways:

  • Tap the red recording indicator at the top of the screen and choose Stop.
  • Open Control Centre again and tap the Screen Recording button.

Your recording is automatically saved to the Photos app.

Tips

Make your recording easier to share

Turn on Do Not Disturb to prevent notifications from appearing.

Close apps containing personal or sensitive information.

Pause briefly before and after the action you want to demonstrate.

Record in the orientation you plan to use when sharing or submitting the video.

App Store Preview

Prepare videos for App Store preview: fix dimensions & audio

Resize video

Change dimensions, aspect ratio and canvas colour

Frequently asked questions

How does it work?

Upload your video and choose the sensitivity that best matches your recording. The tool analyses changes on the screen, removes visually inactive sections, and exports a shorter video that's ready to use.

Is my video uploaded permanently?

No. Videos are stored temporarily while processing and are automatically deleted shortly afterwards.

Does it remove audio pauses or video pauses?

At the moment, the tool removes video pauses by detecting periods of low screen activity. If your recording contains speech, the audio is kept in sync with the remaining video. Audio silence detection is something we are planning to add next.

What is screen activity?

Screen activity means visible changes on your screen, such as moving the mouse, typing, opening menus, switching windows or interacting with your app. When the screen remains mostly unchanged for a while, the tool the tool considers that part of the recording to be inactive and can remove it automatically.

Should I use a preset or Custom mode?

The presets are a great place to start and work well for most recordings. If you'd like more control, switch to Custom to adjust the sensitivity, padding before and after activity, and the maximum gap between active sections.

What does each setting do?

Sensitivity: controls how much visual change counts as activity.

Keep before activity and Keep after activity: adds a little extra video around each active section for smoother transitions.

Maximum pause: keeps nearby actions together when they're separated by only a short pause.

What does the sensitivity slider do?

The tool looks for changes on your screen to decide whether a moment is active. Small changes, like a blinking cursor or moving the mouse, produce relatively little activity. Larger changes, such as opening menus or switching screens, produce much more. Adjust the sensitivity depending on how much movement you want to count as activity.

Is my video uploaded securely?

Videos are processed securely and are not stored permanently after processing.

What video formats are supported?

MP4 and MOV videos are supported.

Do I need to install anything?

No. Everything works directly in your browser.